Monday, July 30, 2012

Did I Do That?: The Sample Knit Saga (cont.)

Ok, so here's the deal. You know how most knit patterns are created with a selvedge edge to keep it from rolling under? (For those not "in the know", that's what those last couple of stitches on each row that don't seem to follow the pattern are for.). Well, I've been knitting the gorgeous Shattered Sun Shawl without that. All the way through the lace and last stockinette sections I started thinking it was a bit odd-- that's when I really started realizing the selvedge edge was missing.

Shattered Sun Shawl

I was beginning to think that blocking the shawl would be the solution. I've never seen a pattern make this type of assumption, but I was willing to go on faith. So I decided to push on into the final stockinette ruffle section of the shawl-- time to consult the pattern. An interesting thing happened when I started reading the next step... I actually read it through to the end since it wasn't just another "stockinette section" and saying to myself 'yeah, yeah, it's more stockinette'. You know what I found when I actually read the instructions? You'll never guess! Ok, you probably will--probably already have! I found a selvedge edge.

befuddled

Scratching my head in confusion-- since patterns don't start a selvedge edge 3/4 of the way through-- I read back through the steps I 'glanced' through the first time. Wouldn't you just know it, there was that pesky little 'knit 2, purl to the last 2 stitches, knit 2' every step of the way. Talk about a palm-slap to the forehead moment... I still can't believe I made such a rookie mistake, being an "Experienced Lace Knitter" and all (see post #3). Trying to figure out where I went wrong has me all befuddled, but I have a theory.

rolling edge

From the very start of this amazingly, luxurious, finger-heavenly project, I've been knitting under the influence of heavy distraction. This mixed with impatient anticipation of such fibery goodness might have led to me take a few teeny shortcuts. I'm fairly certain that I read this part of the instructions at some point early on, and of course made a mental note about it before starting the shawl. And upon further inspection, I can see that I DID include the selvedge edge all the way up to the lace section. But somehow-- between sleep deprivation and toddler demand-- I left this important little nugget of information with other non-essential things such as the square root of 463, and the average birth weight of an African Elephant. And now I have this gorgeous CashSilk Lace shawl 90% finished with no selvedge edge and a bad case of "the rolls". Now to figure out how to fix this.

repair plan

O.K...Here's the plan. Since the selvedge edge on this shawl is only two stitches on each side, I think I can "repair" the stitches. The second from the end on each side will be very easy to drop all the way down and then pick back up correctly. The edge stitch on each side will be a little more complicated-- not sure if I can "repair" this one or not since each stitch is actually two stitches, one right side and one wrong side. I will have to knit up a swatch and experiment. I think if this won't work, Plan B will be to drop the third stitch from the edge and incorporate this column into the selvedge edge instead-- leaving the edge stitches untouched. I will let you all know how it goes once I figure it out myself. Who knows, maybe there will be a tutorial or two that comes out of this!!! Crossing my fingers all will turn out well...


❀✿❀✿❀✿❀✿❀✿❀✿❀✿❀


Thursday, July 19, 2012

Time for The Swap!

I last posted about my dive into the world of ATCs (Artist Trading Cards) and how much fun they have been to make. I left you guys hanging with a teaser of the cards I made for the Good Things Together ATC swap, but now the wait is over!

BEHOLD! My "Celtic Curiosities" ATC set!

Celtic Curiosities ATC cards

They were incredibly fun to make with a few surprise techniques--you know, those great things that are supposed to go one way but go another to work out even better (most of the time). I created these in a three step process:

  • Print the backgrounds
  • Draw and transfer the Celtic Knot-work
  • Glue down the beads

The inspiration for this series actually came from a tutorial I found for the background technique--I knew the second I saw it that I HAD to try it. Like, it would physically hurt if I didn't do this technique. This is where I found the tutorial. It's on a blog called "Tot School" which is an AMAZING source of creativity!!! I honestly can't read it very often because I get lost and forget I have other obligations like work, or laundry,... or kids...

Basically the tutorial instructs you to use shaving cream as a dye base in a cookie sheet or large pan, and swirl in drops of washable watercolor or food coloring. Once you are pleased with your design, you press your whole paper down, remove, and scrape the shaving cream off. Voila! You have a large sheet of great marbled paper that dries very quickly!

Shaving Cream Marble Paper

Since this site is obviously geared towards kids, I felt pretty safe doing a "revised" version of the tutorial. I skipped all those pesky space and easy clean-up concerns since I'm all grown up and know how to contain a mess. *cough*

The first change I made was to use my precut cards instead of one large sheet of paper. (See, no space concerns!) Only catch is that it leaves no part of the paper to pick up that hasn't been smooshed into the shaving cream. Not a big deal until you come to revision number two where I "passed" on the washable water colors and went for the food coloring. On the bright side, my fingers were very lovely shades for several days!!! When I do this again, I will take the advice given and use large sheets and a large cookie sheet instead of my little Pyrex bowl.

But I love the results!!!

marbled cards

Once the marbling was done, my next step was to draw up the Celtic Knot-work. I spent a month or so late last winter determined to learn this technique. I'm still not perfect, but I think I do a respectable job! The swirls and graceful flow of the paper background reminded me of the flowing Celtic art I had spent so much time with, so I felt this was the perfect opportunity to revisit my lessons.

Since I discovered the transparent tendencies of white tissue paper mixed with Mod Podge earlier in my ATC adventures, I decided to use this to my advantage now. I worked out my knots and lines on a plain sheet of paper. Once I was happy with their final appearance, I traced over this sheet onto white tissue paper with a rich purple color. *Before taking this step I tested three different writing utensils with the Mod Podge, and paper to make sure they didn't bleed. two of the three did!!!

celtic design

Now that I had my transparent Celtic design, I cut it into the appropriate sized pieces and Mod Podged them onto the cards-- underneath and on top. I was going to stop here, but I was not happy with the final cards. I felt they were missing something. I wanted a little sparkle that could be part of the design without taking away from the overall feeling of the artwork. I happened to have a ton of silver-tone seed beads, so I felt these would be the perfect shape and size to add a complementary scallop design.

I had this great idea to thread them all onto a string and then easily lay the string down into the line of glue I carefully put onto the card in just the right shape with perfect placement. Guess what?! Didn't work. I think I sorta cried a little and maybe even had a little pity party when I came to this conclusion. I knew I wouldn't have time to individually glue every single bead down and the deadline to post photos was fast approaching.

The solution came to me when I accidentally dropped beads where they weren't supposed to be. I couldn't pick them up, so I gently scooched them into place. This seemed to work fairly well! So I started dropping about 8-10 beads onto the card at a time and pushed them into place. After doing this with every card, I went back to the beginning and absolutely covered the beads in Mod Podge-- I mean, I slathered it on Hot Fudge Sundae style! It was so thick and white when I finished that I was very worried it would not dry clear. (I'm sorry I didn't get a photo of this because it really was a site!) But luckily it dried perfect with what seems to be a very secure bond, so I am very happy with the process.

ATC Bead Details

So when all is said and done, I now have six ATCs ready for my group swap! After seeing some cards from previous swaps, I am very excited to start collecting my own! They are unique little treasures that showcase each artist's heart and soul. I hope that mine are appreciated and cherished just as much, and that this is just the start of a wonderful new artistic obsession!

Here are a few of the cards I have been drooling over for the last month or so:

Created by spookycuddles on Ravelry
spookycuddles ATCs
Created by delights on Ravelry
delights ATCs
Created by KristyRecycles on Ravelry
KristyRecycles ATCs

I can't wait to see what I get from the grab bag of goodies! And then to figure out how I will keep them... I love the idea of a little bedside table photo-frame, or maybe mini frames for the fridge? I can't bear the thought of closing them away in some book somewhere only to be visited occasionally. I will have to research some options! Maybe you will see a post sharing some of my favorite ideas in the near future...!


❀✿❀✿❀✿❀✿❀✿❀✿❀✿❀


Sunday, July 15, 2012

New Crafting Fun, or Devistatingly Enjoyable addiction...?

Free time is not common in my life. I have to budget family time, and my Etsy store, with domestic chores and cooking to boot! So when the opportunity to do an ATC (Artist Trading Card) exchange with some friends from Ravelry came up, you know I had to pass.

yes I can

But I didn't.

Nope! I decided that I deserved some "out of the box" time and dove in instead. I had never even heard of ATCs before this exchange and am super glad they have entered my creative life! They are an incredible outlet for stagnating creativity and act almost like a cure for the writer's block of the crafting world. With each card being such a small canvas, they are a perfect mix of limited time investment with awesomely powerful results. For those who are not familiar with these little beauties, this is a brief description I snatched from Wikipedia:

"Artist trading cards (or ATCs) are miniature works of art about the same size as modern baseball cards...Cards are produced in various media, including dry media (pencils, pens, markers, etc.), wet media (watercolor, acrylic paints, etc.), paper media (in the form of collage, papercuts, found objects, etc.) or even metals or cloth. The cards are usually traded or exchanged."

These little babies are a great way to play with different techniques and play in new artistic arenas. Have you ever seen something and said "oh I wish I knew how to do that" or "this would look so much better if the artist had only done ______"? Well, this is the perfect outlet for that type of creative energy/frustration. Ok, now that we are all "in the know", I'll tell you a little about my ATC experiences thus far.

In the Ravelry group "Good Things Together", we often host group crochet-a-longs, knit-a-longs, and just general craft-a-longs. One of the most recent happenings has been the ATC swap I mentioned. Since I was new to this whole arena, I drew inspiration from some of the other group member examples and played around with a few before diving into my swap obligations. A general theme flowing through the group was a collage/decoupage approach, so I grabbed up some scrapbook paper and embellishments and jumped on the boat!

mod podge

*MOD PODGE IS DA BOMB!*
No, I am not being paid to advertise, and I'm not looking for endorsements, but this stuff totally rocks! I've never used it before this swap, but I have already incorporated it into other projects as well-- new craft staple for me!!! It's like shiny varnish and heavy duty glue all in one with no lumpy, clumpy, gooey issues to deal with. I don't think I could have achieved such nice results without it. My very first ATC actually ended up being an ACEO (Art Card Editions and Originals)-- the main difference being that this one is not intended for trade purposes. The timing of all this just happened to coincide with the very first Everyday Peacocks give away, so I decided to incorporate my "ATC" into the packaging of this special prize. (Originally I was going to include a matching case, but it did not turn out the way I wanted and therefore became another jewelry box for my daughter.)

ACEO Process

The process was fairly straight forward:

  • Paint card with pale watercolors (and sprinkle with salt before drying)
  • Create pattern from sketch
  • Cut out paper pieces
  • Mod Podge design onto card
  • Draw doodles wherever my pen wanted to go
  • And add rhinestone details.
Once the outside was ready, I printed my Silver Jewelry Care sheet and finished up the inside information part of the card. All together-- not including drying times-- this took about 2-3 hours of hard creative labor. Below is the result of my efforts:

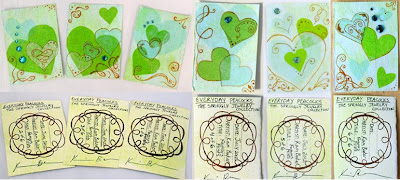
ACEO Card

I really quite liked how this one turned out, and how nicely it incorporated into my jewelry packaging, so I decided to make a quick set of customer appreciation ATCs to send out with the first internet orders I received for Everyday Peacocks! The series is titled "Famous Firsts" and has six cards:

FamousFirsts ATCs

For these, I followed the same process, only I used tissue paper instead of scrapbook paper to get that translucent effect. And with that, my warm-up cards were done! Time to dive into the deep end and create some true crafty works of art for my group swap...

TO BE CONTINUED (but here is a juicy preview...)

Swap Preview

Thursday, July 12, 2012

Twelve years

It's been twelve years today since my daughter was born. I know it's cliche to say that time flies, but I honestly don't now where the years went! I can still remember her as the cheesy little cut-up always grinning and charming her way out of trouble when she was a toddler. And that sassy little six year old girl still grinning and charming her way out of trouble. I guess old habits die hard cause six years later she's still grinning and charming her way outta trouble... or trying to anyway...

I think this journey with her has been very bittersweet. I've been a working mom (outside of the home) for the vast majority of her life. And the times I was at home I was either a very focused University student, or mothering a very demanding baby boy. I've been so proud watching her grow and become her own person-- but I'm very sad it's been mostly from the sidelines.

The main reason I've chosen to pursue a homemade business is to allow me more time with my children. The irony is that instead of spending more time with them, I am getting to spend more time telling them why I can't spend more time with them! (Does this sound familiar to anyone?) The reality is that I am physically more available to my family, but it somehow comes with a higher stress level as I mentally juggle around my agenda to make sure everything gets done-- home, family, and business related-- while also constantly reevaluating current priorities. Telling my child "not today, Mommy has work to do" always weighs especially heavy on my heart.

So where does this magical balance lie? Or is it as fictional as the TV family of the 1950s, living only in the dream world of the overwhelmed housewife? We can find many success stories and read many blog posts about the joy of staying home with the kids while running a Cottage Business, but Internet is just another form of mass media where the lines of truth often become quite blurred.

I'm not giving up, though! Call, me a hopeless romantic, or an optimistic fool, but I just can't believe dreams don't come true. At times working at home has been incredibly successful for me-- in that I get my work done for the day and then have some great quality time with my children. But as the children get older, their demands and expectations change. The toddler boy has hit a phase of "give me what I want now, or else", and the pre-teen girl has hit a phase of " you BETTER give me what I want now, or else". I can't even begin to tell you how challenging and frustrating this is, as a mother. But as a business owner, it's devistating. I keep reminding myself that this too shall pass and make a real effort to go with the flow... I'll let you know how this works out once I know myself! I catch an occasional glimpse of daylight at the end of the tunnel, and I swear the road is getting shorter. Now I just have to be patient and believe that everything I'm working towards will be worth the blood, sweat, and tears!

Saturday, July 7, 2012

Busy, Busy, Busy!

Well, I'm not quite sure how it happened, but things have started really buzzing around the studio! I'm learning to hop, skip, and jump in all news ways with everything going on these days...

Summer is finally in full swing here in Southern Quebec. The heat and humidity Is so thick some days that I swear my silver might melt! Something about this kind of weather makes the kiddos a little loopy as well, which always makes life a bit more interesting. The 12 year old (this week!) girl is in a constant state of boredom interspersed with embarrassment over a seriously uncool mom. And the almost 2 year old boy is not happy unless he is in a constant state of motion-- pushing his limits totally counts here. Throw in a husband who is in full-on summer maintenance mode and I get zero time to myself.

Despite "all the above", Everyday Peacocks is starting to really grow! The Springly Collection is finally complete with all items available in the online store. And now that I am wrapping up my first really large order, for Mont Tricot in Sutton, QC, I can turn my focus to new designs and products! With the change in seasons Everyday Peacocks will see vibrant new colors dressed in copper, brass, and bronze. (I may even get the chance to start playing with wood... This is a long overdue to-do list item for me!). But first I have to clean up the studio--big messes are definately a by-product of creativity.

Beyond the massive order heading to Mont Tricot this weekend, my Yarn Jewelry has been doing a bit of traveling recently, heading out to Virginia, California, and Massachusetts. And now, with the latest shipment to Germany, Everyday Peacocks has gone global! It's very exciting to realize that my creations are bringing smiles to so many people in so many places. I look forward to all my future journeys and hope I may visit you soon, too!

So the light is starting to show at the end of a long tunnel and I am due for a nice break. This Sunday I am treating myself to a wonderful, yarny day out! I will be spending the afternoon in Sutton catching up on my Shattered Sun Shawl, petting and squeezing new Indigo Moon Yarns, picking out my first ever sock project, and enjoying the great camaraderie I always find at Mont Tricot. Oh, and coffee... Blissfully prepared "I didn't make this myself" coffee. If you are in town, drop on by and say hi--I love meeting new people and sharing in yarny goodness!

Sunday, July 1, 2012

Everyday Peacocks Knitting Tool Sets Now Available Online!


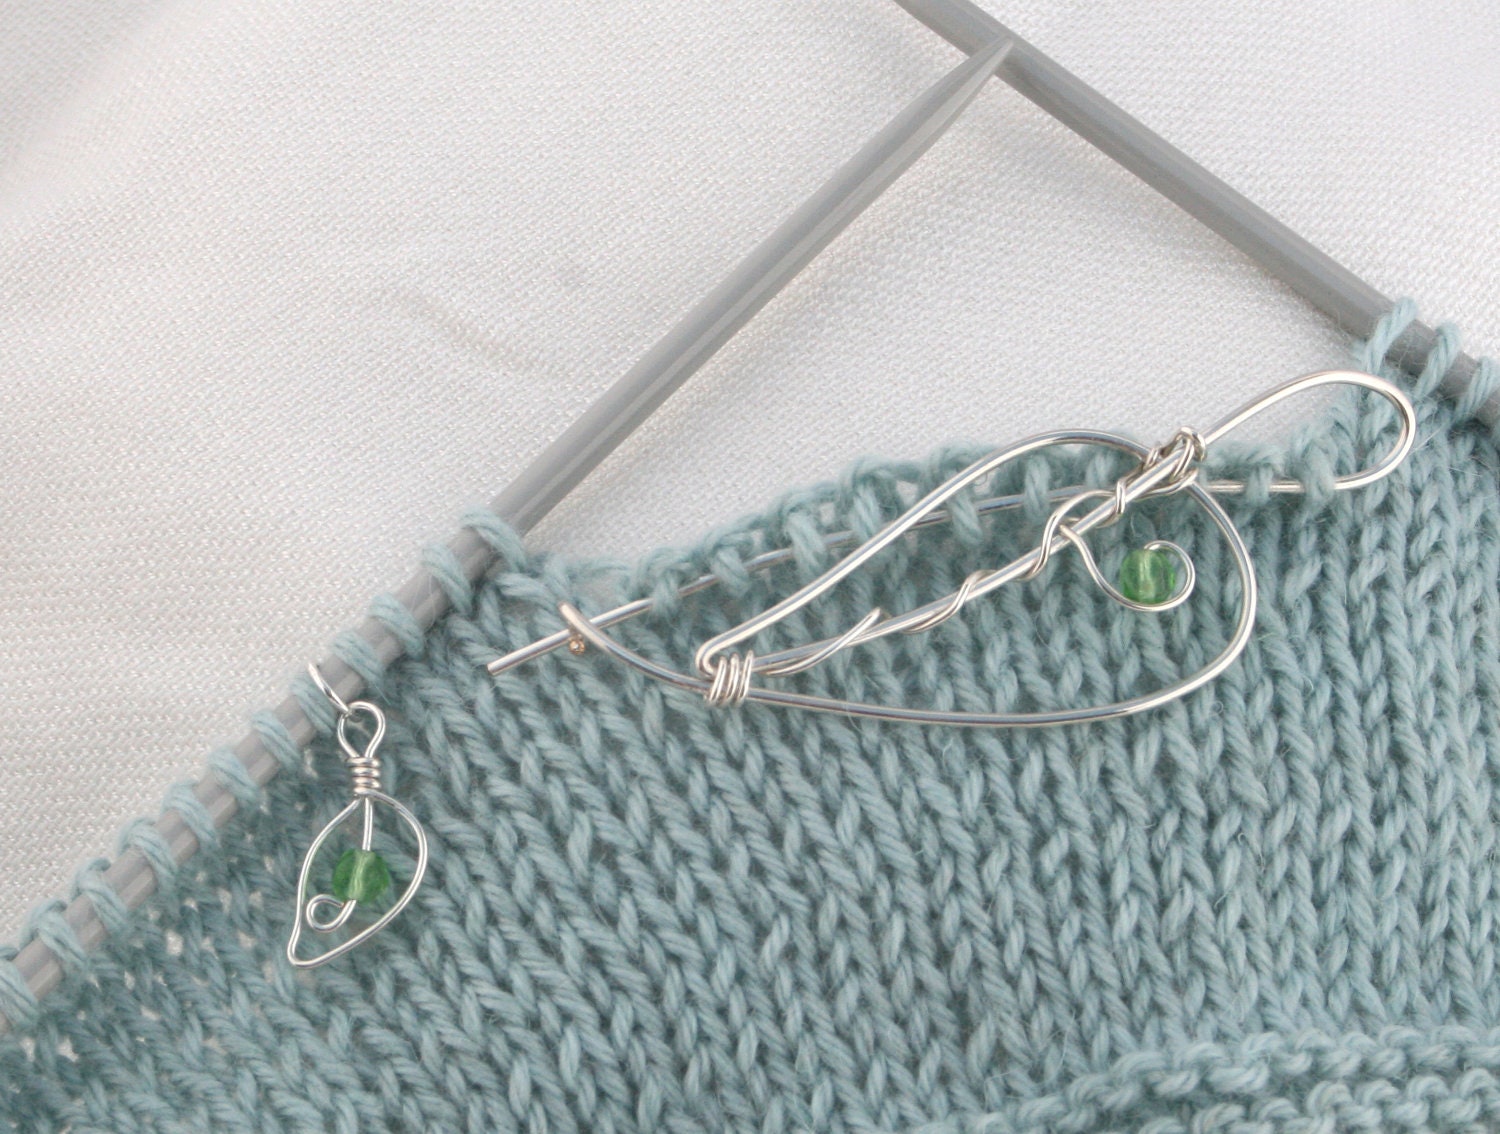
After what seems like months of planning and photo taking, I am proud to (finally!) have Sterling Silver Knitting Tool Sets for sell in my online store!

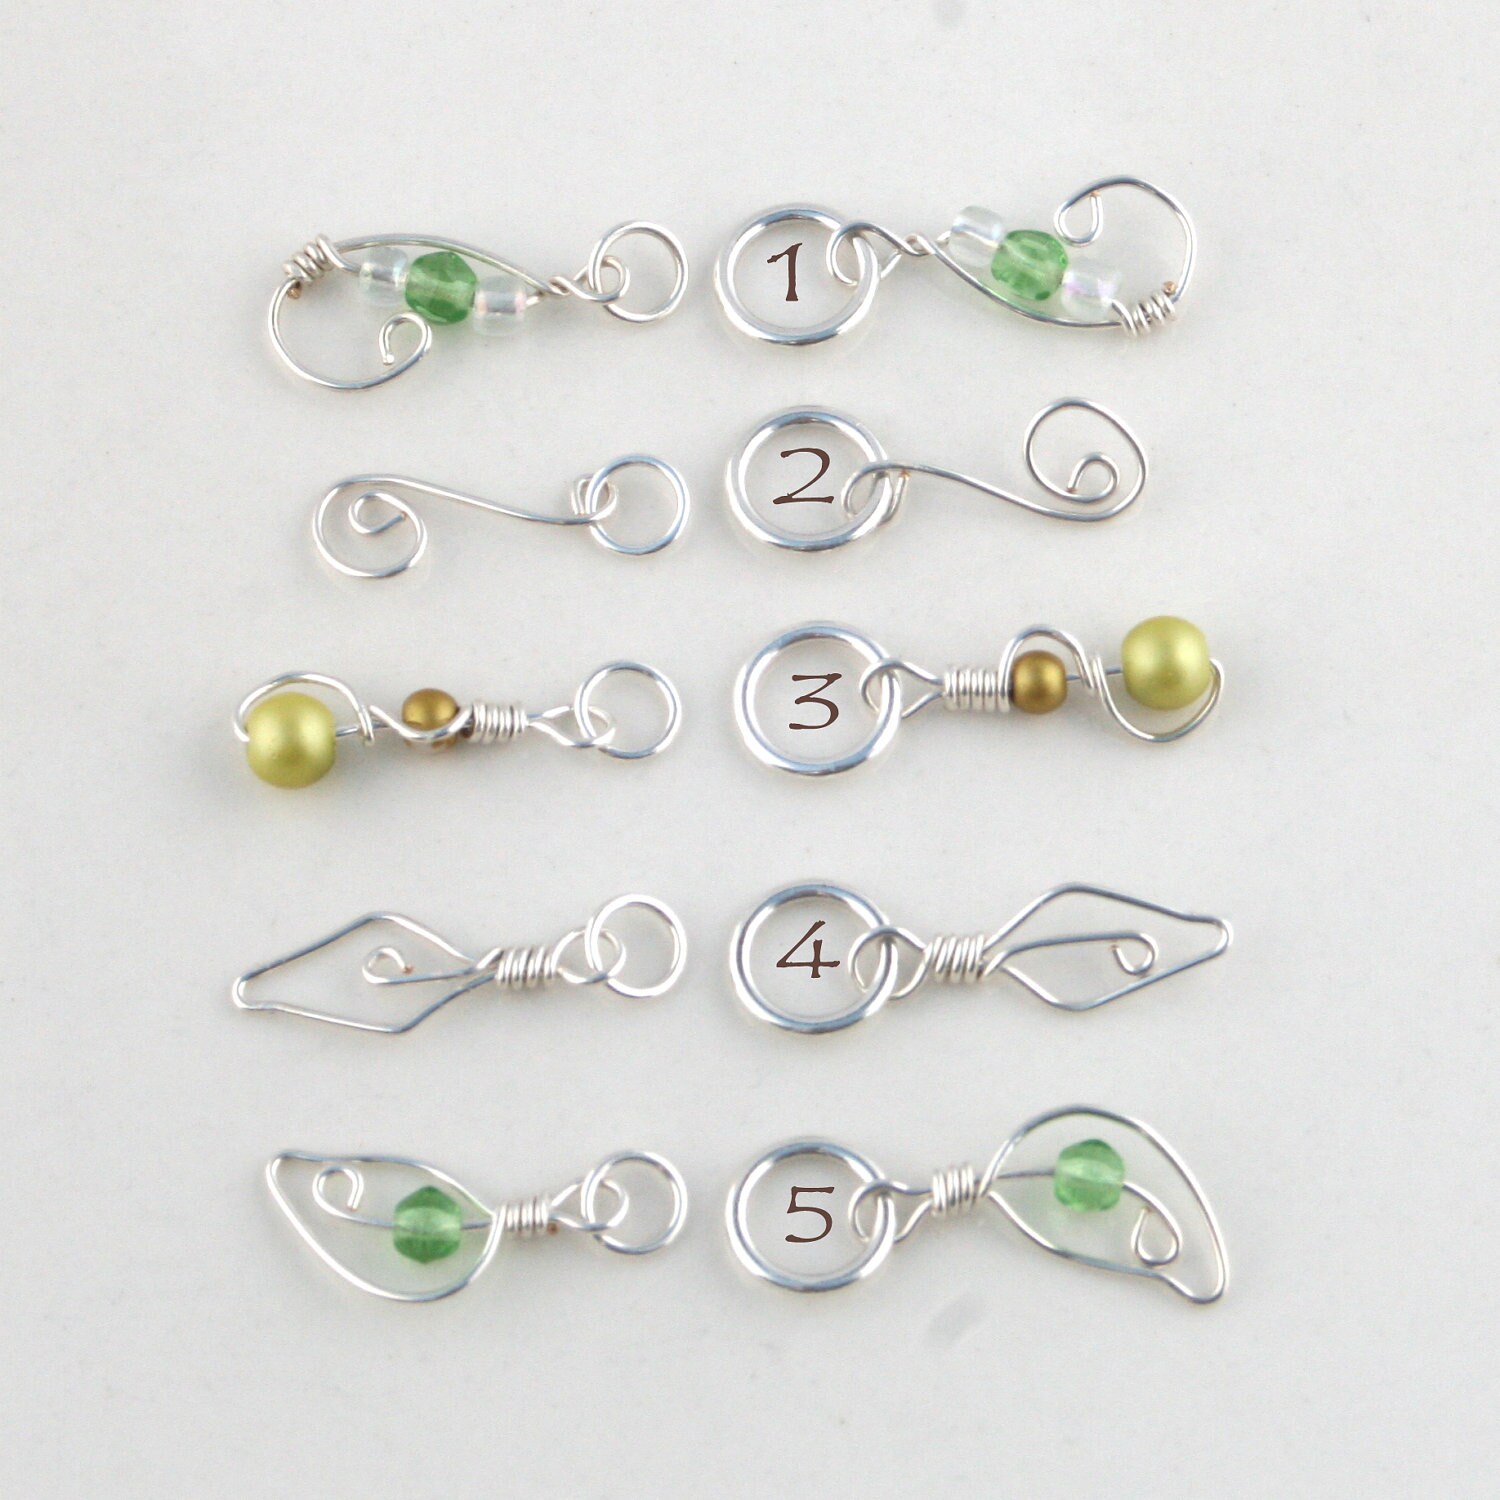
Each set comes complete with one Sterling Silver Stitch Holder and five matching Stitch Markers. All sets are listed with the basic option, but I am happy to customize with a different set of markers or markers made for larger needle sizes. Just let me know and I'll create a custom listing just for you!

Stitch markers are also now available up to a needle size US 10.5 (UK 7, 4.5mm) for five of my designs. The other designs will be available in the larger size very soon!