Monday, October 22, 2012

Who's Keeping Your Crochet?

With the arrival of the Cascade Collection comes the introduction of the new Everyday Peacocks Crochet Tools!

Everyday Peacocks Crochet Keeper

THE CROCHET KEEPER
*...*...*...*...*...*...*...*...*...*...*...*...*

The next tool being introduced is something unique, and the very definition of fabulous decadence-- the Crochet Keeper! The concept for this tool came directly from the feedback of crocheters. I asked what types of tools crocheters might need--that I am unaware of, since I am not proficient in this crafty art form. Most folks told me there were not many accessory tools used other than stitch markers (and of course the main tool, a crochet hook.) Several people mentioned they use their markers to "hold" their projects when they put them down--so that the yarn or string won't unravel. Personally I have always left my hook in place and carefully stored the crochet Work In Progress (WIP), crossing my fingers that the hook would not slip out! I said to myself, 'there's gotta be a better way...'

crochet hooks

Since this is a common problem, I decided it was worth solving. The main objectives for this tool would be:

  • Free up hooks to use on simultaneous projects
  • Free up crochet markers to use on simultaneous projects
  • Eliminate the chance of the tool accidentally falling off
  • And keep WIPs from unraveling in the most decadent and fabulous way possible!

yarn ball

From this, the Crochet Keeper was born! These easy to use Crochet Keepers will not only effectively protect your WIPs from unraveling when not being worked on (with their unique double loop design), but they will look gorgeous while doing it. Liberate your crochet markers and hooks letting them do what they love most-- help you with other projects!!!

Since crochet work can take so many forms, and use so many weights of yarn, I felt one type of Crochet Keeper was not enough. Therefore, I am offering two sizes -- Light Weight for those daintier and light weight yarn projects, and Heavy Weight for those thicker worsted or bulky weight projects. The sizes are really developed for aesthetic purposes, since either size will work for any project, but for those very delicate projects I do recommend the smaller keepers due to the thicker wire being a bit heavier in physical weight. If you are worried these sizes may not suit your needs, let me know and we can figure out a solution together!

As I am sure you have all guessed by now, I take great pride in my work and absolutely love the way these tools have turned out. Next time I will be introducing Everyday Peacocks Crochet Tool Sets! As this is a new arena for me, any comments or suggestions you may have would be great; if there are any crochet needs that I might be able to help with, leave me a note in the comments! I love discovering new things!


*...*...*...*...*...*...*...*...*


Tuesday, October 9, 2012

Totally Green Contest--TOP 3

OK, Folks, you've voted, and the Totally Green Contest is now in the Finals round!!! This is it-- this vote is for ALL the cookies (or $350 gift pack in this case!) Here are your FINAL THREE CONTESTENTS...

Here's a quick view of the final three projects (in no particular order):

Totally Green Contest Top 10 Contestants!

Perpetual Calendar
Burlap Bins
Macaroni and Cheese Costume

That's it folks! If you see something you LOVE, head on over to Totally Green Crafts and vote! Remember, the winner will be getting a huge $350 prize pack!!! More details on each of these projects can be found on the contest page. Good luck to all these well-deserving recycling geniuses!

❀✿❀✿❀✿❀✿❀✿❀✿❀✿❀


Monday, October 1, 2012

Totally Green Contest--TOP 10

It's finally arrived! The Totally Green Contest has moved into the Semi-Final round!!! Now it's up to you-- the viewing public-- to vote for your favorite crafts and ideas to move THREE of these great projects into the final round...

Here's a quick view of the final ten projects (in no particular order):

Totally Green Contest Top 10 Contestants!

Mosaic Wall Decor
Music Sheet Monogram
Halloween Haunted House
Perpetual Calendar
Mail Art Postcard
Burlap Bins
Dollhouse
 Holiday House Place Cards
 Rocket Powered Jet Pack
Macaroni and Cheese Costume

That's it folks! If you see something you LOVE, head on over to Totally Green Crafts and vote! Remember, the winner will be getting a huge $350 prize pack!!! More details on each of these projects can be found on the contest page. Good luck to all these well-deserving recycling geniuses!

❀✿❀✿❀✿❀✿❀✿❀✿❀✿❀


Thursday, September 27, 2012

Mini Blog-ette

COMING SOON to Everyday Peacocks:

Crochet Tools!

Capt. Hook

Grab your hooks and Stay tuned for details...

Tuesday, September 25, 2012

ATC Swap Loot!

Back in July I wrote about a new crafting adventure I threw myself into-- Artist Trading Cards (ATCs). I dove headfirst into this incredibly enjoyable artistic endeavor, discovering the many missing elements in my creative life.

FamousFirsts ATCs

Of course I didn't make this journey alone. Oh no,I was egged on by some friends from Ravelry. Ok, here's a quick recap. Some of the Ravelry group "Good Things Together" decided to do a quick ATC swap as a way for us to explore what was a new art form for most of us. This is the series of ATCs that I contributed to the swap:

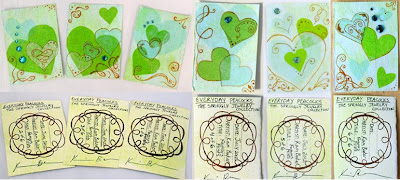
Celtic Curiosities ATC cards
(You can read more about how I made them by following this link.)

After a long postal delay-- beyond anyone's control--my new little treasures finally arrived the other day, and I couldn't be more pleased with them all! So here's my little gallery for you to take a quick stroll through if you like:


Mary
ATC Card

"Sailing Away" series 1 of 3
maryootsy on Ravelry


Tess

ATC Card

"Party Line" series 3 of 3
girliecurls on Ravelry


Kristy


"Stary Sky"


ATC Card

"Blind Contour Self Portrait"
KristyRecycles on Ravelry


Dona


"Life by the Sea" series 1 of 8


ATC Card

"Not Too Shabby" series 6 of 6
Dona on Ravelry


Claudia

ATC Card

Untitled


ATC Card

"GTT Friends" series 3 of 6


ATC Card

"My Flower Photography" series 5 of 7
delights on Ravelry
(Our swap hostess with the mostess! Thanks Claudia!)


This little swap really was a lot of fun and reminded me about parts of myself I sometimes ignore. I look forward to similar opportunities in the future, should they arise, and I encourage everyone else to do so as well... You never know what you might discover about yourself!


❀✿❀✿❀✿❀✿❀✿❀✿❀✿❀


Tuesday, September 18, 2012

Mini Blog-ette

If I were a really, really, REALLY fast knitter, this is what I'd knit today:
Chaussons Hedwige

"Chaussons Hedwige" by Marie Christine

And the perfect soft and snuggly yarn for these:

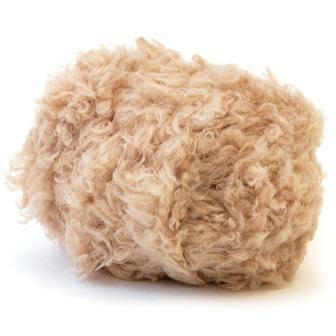
Caribou by HiKoo

Caribou from HiKoo by Skacel Collection, Inc.

Saturday, September 15, 2012

Pattern: Fancy Bottle Cozy

The other day I was in need of a super quick knitting project that I could just knit on the fly. I've been dying to make a beer cozy for several years now, so this just seemed like the right time for it! I wasn't thrilled with any of the patterns I'd seen-- not because they are bad or ugly, they just weren't "ME". What resulted is me just improvising a pattern as I went along.

Fancy Bottle Cozy

Turned out to be pretty easy to remember, so now I'm sharing the pattern with anyone who might be interested. I created it to fit a typical beer bottle, but the pattern could be easily modified to fit other bottles or cans, depending on your needs (but I think it's the decreasing neck section that makes it soooo sexy!)

❀✿❀✿❀✿❀✿❀✿❀✿❀✿❀

PATTERN:

Long tail cast on 9 stitches. Join to work in the round, place marker.

BOTTOM:
Row 1 - Knit to marker
Row 2 - (k1, yo)* repeat to marker
Row 3 - Knit to marker [18 stitches]
Row 4 - Repeat Row 2
Row 5 - Knit to marker [36 stitches]

BASE SET-UP:
Row 6 - Purl to marker
Row 7 - Purl to marker
Row 8 -Knit to marker
(Repeat Row 8 four more times)

LACE SECTION (Chart below):
Row 9 - (k, yo, k4, sk2p, k4, yo, place marker)* 3 times
Row 10 and all even rows - (p, k to marker)* 3 times

~* YOU SHOULD NOW HAVE 3 MARKERS AND 36 STITCHES *~

Row 11 - (p, k, yo, k3, sk2p, k3, yo, k)* 3 times
Row 13 - (p, k2, yo, k2, sk2p, k2, yo, k2)* 3 times
Row 15 - (p, k3, yo, k, sk2p, k, yo, k3)* 3 times
Row 17 - (p, k4, yo, sk2p, yo, k4)* 3 times
Row 19 - (k, yo, k4, sk2p, k4, yo)* 3 times

WORK ROWS (11-20) 2 times

NECK SECTION:
Row 21 - (p, ssk, k7, k2tog)* 3 times [30 stitches]
Row 22 - (p, k to marker)* 3 times
Row 23 - (p, k, p, k, sk2p, k, p, k)* 3 times [24 stitches]
Row 24 - (p, k to marker)* 3 times
Row 25 - (p, k, p, sk2p, p, k, remove marker[except end of row marker])* 3 times [18 stitches]

Rows (26-end) p1, k1 rib around to desired length. I did 7 rows ribbing before bind off.

Bind off using whatever S-T-R-E-T-C-H-Y bind off method you like best. I followed this tutorial by SlipSlipKnit.com (excellent for use with ribbing.)

~*IMPORTANT TO NOTE!!!*~

I looped my yarn through the first stitch of the bind-off and tied it off before trying the cozy on my bottle--big time rookie mistake! The opening was too tight!!! Luckily I was able to unknot my yarn and redo the finishing. I instead looped my end through the first purl stitch on the row below before tying off, and now the cozy just squeezes on. Next time, I will bind off a little looser.

Fancy Bottle Cozy

A couple more photos can be found on my Ravelry Pattern Page if you'd like to see more details. I'd love to see what you do with this super-quick and fun pattern!


❀✿❀✿❀✿❀✿❀✿❀✿❀✿❀


Friday, September 14, 2012

Mini Blog-ette

If I were a really, really, REALLY fast crocheter, this is what I'd crochet today:
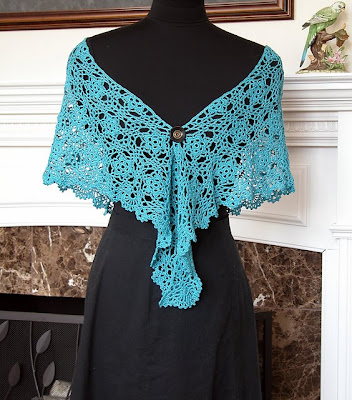
Cool Blue Evening Shawl

"Cool Blue Evening Shawl " by Kathryn A. Clark

Sunday, September 9, 2012

Mini Blog-ette

If I were a really, really, REALLY fast knitter, this is what I'd knit today:
Tulipa by Birgit Freyer

"Tuch/shawl *Tulipa*" by Birgit Freyer

Friday, September 7, 2012

Mini Blog-ette

If I were a really, really, REALLY fast knitter, this is what I'd knit today:
luke-the-locker-monster

"Luke the Locker Monster" by Julie L. Anderson

Wednesday, September 5, 2012

Crash Course in #210 Hempton by Hemp for Knitting

For the last month or so I've been working on a super hush-hush, top-secret test knit for Sarah Wilson (a.k.a. The Sexy Knitter).  I can't tell you much, but I can say that the pattern is a really nice and handy Market Tote.  I've been sworn to secrecy about the project-- which turned out really great-- so for now all I can do is talk about the yarn I used and hope it satisfies my dire need to share this fun knit with everyone!

The Sexy Knitter Blog

I knew I wanted to create an easy to wash and care for material since (duh!) I plan to use this bag for trips to the store-- groceries and general goods both.  The pattern calls for a sock weight yarn, but I was a bit worried about the durability under repeated strain.  So I snatched up my list of requirements, jumped in the car, and headed to Mont Tricot to scout the shelves for the perfect substitute.

yarn equation

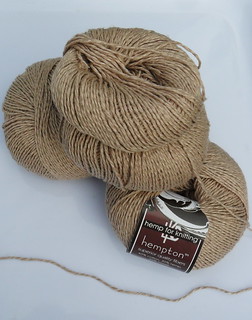
As always, Lucinda was an amazing help and spent at least an hour with me squishing and stretching and comparing yarns.  After much torn contemplation I chose a wonderful rosey-tan color #210 Hempton yarn from Hemp for Knitting.  (You can see all the specific details about this yarn on Ravelry by clicking this link.) This yarn is a cotton/hemp/modal blend with no stretch and incredible strength!  So I made my purchase and skipped happily out the door, anxious to start swatching for my big test-knit adventure.

yarn measure

First thing I did when I got home was break out the knitting needles to cast on.  I worked my over sized square (just for good measure... Hey!  Is knitting swatches where that saying comes from?), quickly soaked it in warm water, and pinned it out to measure my surely perfect gauge. *cough, cough*. Well, first time didn't quite do it.  In fact, second time didn't either-- I ended up changing needle size and diving into the pattern... I know, I know, BAD test-knitter!  But it turned out great and gauge in the project is spot on.  (Besides, we all know that gauge swatches lie.)

Hemp for Knitting

Knitting with this yarn has been a very different experience for me.  So here you go... Crash Course in Hemp for Knitting's #210 Hempton:

  • Seems like it should be splitty but isn't-- like two strands of lace weight plied together
  • Hemp, like cotton, does not forgive uneven stitches-- though this is not as noticeable in a lace pattern
  • Very soft with great drape and feel! (That's the modal/rayon talkin')
  • Incredibly more elastic than anticipated with larger needles-- I knit this project with US 6 (4mm) needles, and the holes in the fabric allow for great stretch though I doubt it would have much elasticity when knit tightly on smallish needles.
  • Requires different handling, it doesn't glide easily like acrylic, silk, merino, or other smooth yarns-- reminds me of harsh cotton in that way
  • End of ball gets sloppy, good idea to wind it first-- no fault of the manufacturer, just the drape of this yarn combined with its weight and small ball size makes it very susceptible to start unwinding from the inside also towards the end.  I found the end tangling with the working yarn when I was still many yards from finishing the ball.
  • Not many join options-- could not wet splice (not wool), could not Russian join (each of the 2 loose plys is incredibly tightly wound), so I had to settle for knotting.  We won't even talk about weaving in ends-- not my strongest skill to begin with, but I was in absolute fits with this yarn.  I ended up glueing the knots with Fabric glue and snipping the ends.  (Fingers crossed...)
Hempton swatch

CONCLUSION:

Overall, used for the right project, I absolutely love this yarn!  There are some fiddley things about it, but if you are aware of these they are easy enough to accommodate.  I love this fabric for a durable tote bag, a nice cozy autumn morning wrap, or even a loose fitting drapey sweater.  I don't think it would be a good choice for very structured clothing because of the smooth drape, or for outerwear (hats, mittens, scarves, etc.) since it's relatively heavy and not very warm.  But I absolutely love the stitch definition it gives and the subtle sheen!  I'm happy to say that I have almost one full ball of Hempton left over... Now to find the perfect pattern for it!


❀✿❀✿❀✿❀✿❀✿❀✿❀✿❀


Thursday, July 19, 2012

Time for The Swap!

I last posted about my dive into the world of ATCs (Artist Trading Cards) and how much fun they have been to make. I left you guys hanging with a teaser of the cards I made for the Good Things Together ATC swap, but now the wait is over!

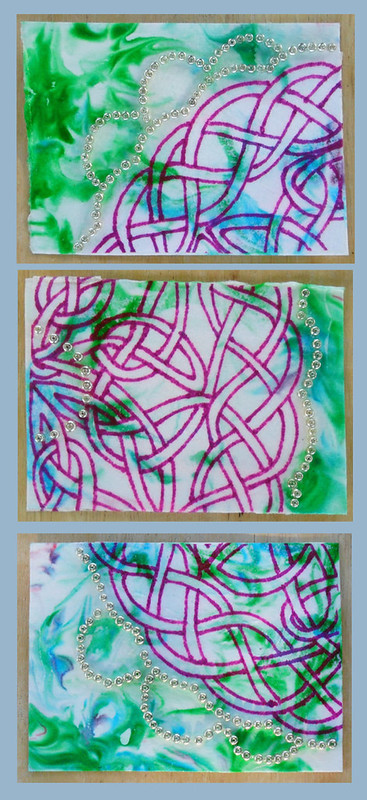
BEHOLD! My "Celtic Curiosities" ATC set!

Celtic Curiosities ATC cards

They were incredibly fun to make with a few surprise techniques--you know, those great things that are supposed to go one way but go another to work out even better (most of the time). I created these in a three step process:

  • Print the backgrounds
  • Draw and transfer the Celtic Knot-work
  • Glue down the beads

The inspiration for this series actually came from a tutorial I found for the background technique--I knew the second I saw it that I HAD to try it. Like, it would physically hurt if I didn't do this technique. This is where I found the tutorial. It's on a blog called "Tot School" which is an AMAZING source of creativity!!! I honestly can't read it very often because I get lost and forget I have other obligations like work, or laundry,... or kids...

Basically the tutorial instructs you to use shaving cream as a dye base in a cookie sheet or large pan, and swirl in drops of washable watercolor or food coloring. Once you are pleased with your design, you press your whole paper down, remove, and scrape the shaving cream off. Voila! You have a large sheet of great marbled paper that dries very quickly!

Shaving Cream Marble Paper

Since this site is obviously geared towards kids, I felt pretty safe doing a "revised" version of the tutorial. I skipped all those pesky space and easy clean-up concerns since I'm all grown up and know how to contain a mess. *cough*

The first change I made was to use my precut cards instead of one large sheet of paper. (See, no space concerns!) Only catch is that it leaves no part of the paper to pick up that hasn't been smooshed into the shaving cream. Not a big deal until you come to revision number two where I "passed" on the washable water colors and went for the food coloring. On the bright side, my fingers were very lovely shades for several days!!! When I do this again, I will take the advice given and use large sheets and a large cookie sheet instead of my little Pyrex bowl.

But I love the results!!!

marbled cards

Once the marbling was done, my next step was to draw up the Celtic Knot-work. I spent a month or so late last winter determined to learn this technique. I'm still not perfect, but I think I do a respectable job! The swirls and graceful flow of the paper background reminded me of the flowing Celtic art I had spent so much time with, so I felt this was the perfect opportunity to revisit my lessons.

Since I discovered the transparent tendencies of white tissue paper mixed with Mod Podge earlier in my ATC adventures, I decided to use this to my advantage now. I worked out my knots and lines on a plain sheet of paper. Once I was happy with their final appearance, I traced over this sheet onto white tissue paper with a rich purple color. *Before taking this step I tested three different writing utensils with the Mod Podge, and paper to make sure they didn't bleed. two of the three did!!!

celtic design

Now that I had my transparent Celtic design, I cut it into the appropriate sized pieces and Mod Podged them onto the cards-- underneath and on top. I was going to stop here, but I was not happy with the final cards. I felt they were missing something. I wanted a little sparkle that could be part of the design without taking away from the overall feeling of the artwork. I happened to have a ton of silver-tone seed beads, so I felt these would be the perfect shape and size to add a complementary scallop design.

I had this great idea to thread them all onto a string and then easily lay the string down into the line of glue I carefully put onto the card in just the right shape with perfect placement. Guess what?! Didn't work. I think I sorta cried a little and maybe even had a little pity party when I came to this conclusion. I knew I wouldn't have time to individually glue every single bead down and the deadline to post photos was fast approaching.

The solution came to me when I accidentally dropped beads where they weren't supposed to be. I couldn't pick them up, so I gently scooched them into place. This seemed to work fairly well! So I started dropping about 8-10 beads onto the card at a time and pushed them into place. After doing this with every card, I went back to the beginning and absolutely covered the beads in Mod Podge-- I mean, I slathered it on Hot Fudge Sundae style! It was so thick and white when I finished that I was very worried it would not dry clear. (I'm sorry I didn't get a photo of this because it really was a site!) But luckily it dried perfect with what seems to be a very secure bond, so I am very happy with the process.

ATC Bead Details

So when all is said and done, I now have six ATCs ready for my group swap! After seeing some cards from previous swaps, I am very excited to start collecting my own! They are unique little treasures that showcase each artist's heart and soul. I hope that mine are appreciated and cherished just as much, and that this is just the start of a wonderful new artistic obsession!

Here are a few of the cards I have been drooling over for the last month or so:

Created by spookycuddles on Ravelry
spookycuddles ATCs
Created by delights on Ravelry
delights ATCs
Created by KristyRecycles on Ravelry
KristyRecycles ATCs

I can't wait to see what I get from the grab bag of goodies! And then to figure out how I will keep them... I love the idea of a little bedside table photo-frame, or maybe mini frames for the fridge? I can't bear the thought of closing them away in some book somewhere only to be visited occasionally. I will have to research some options! Maybe you will see a post sharing some of my favorite ideas in the near future...!


❀✿❀✿❀✿❀✿❀✿❀✿❀✿❀